
When the SSD fills up, updates fail first, followed by apps. macOS does clean up in the background, but it doesn't remove everything: device backups, old downloads, app data, and local restore points remain until someone accesses them. The good news is that no additional program is needed, just the right places in the system.
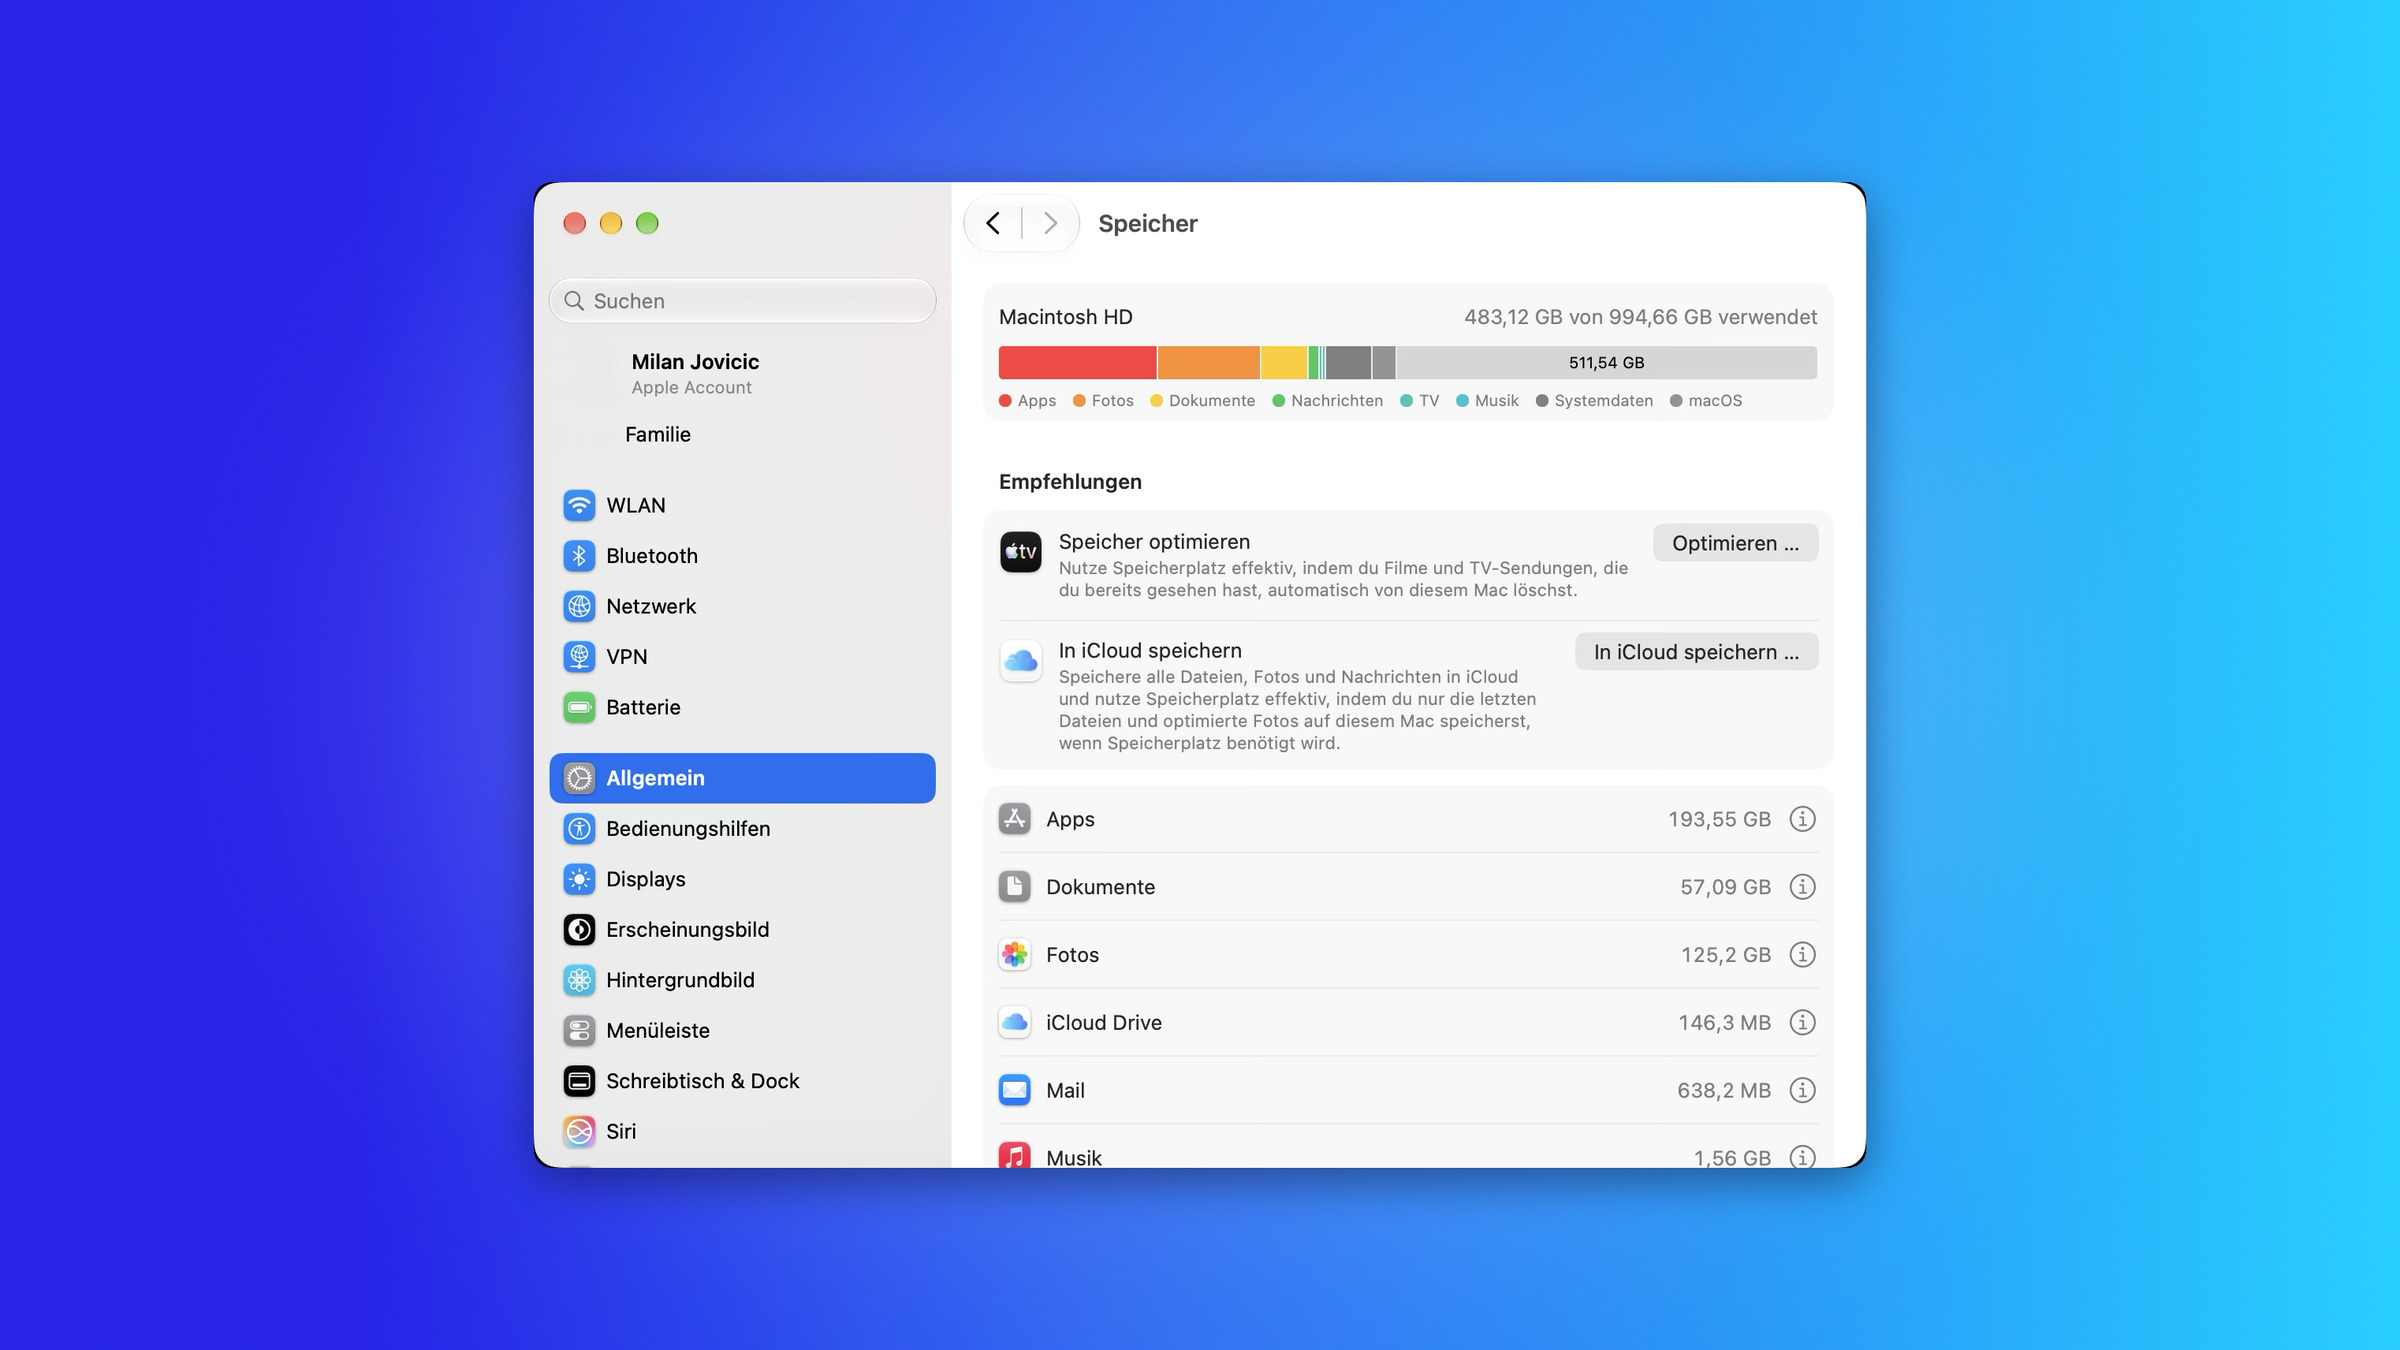
The storage overview in System Preferences is the starting point for everything else. It shows how much storage each category is using and offers direct cleanup options for most of them. Apple describes the options in the support document on freeing up storage space on your Mac.
The order is important: first the large files, then the smaller ones. Deleting individual files might free up a few hundred megabytes, while leaving 60 gigabytes of old iPhone backups untouched. There are separate instructions for the iPhone itself if its storage is full.
Key Facts at a Glance
- The starting point is the storage overview under System Settings, General, Storage
- The largest individual items are usually device backups from iPhone or iPad, photos, and the Downloads folder.
- Local Time Machine save points take up space, but disappear automatically as soon as it is needed.
- „"System data" is a collective category and is not emptied manually.
- In the Library folder, only remove remnants of apps that have been safely uninstalled.
How to correctly read the storage overview
It can be found via the Apple menu, System Preferences, in the sidebar General, and then Storage. After a moment, a bar with the categories appears, followed by a list. Where a "More Info" button appears, it leads directly to the management of the respective category—for example, Applications, Documents, Messages, Podcasts, Trash, and TV.
| Category | What's behind it | How to gain space |
|---|---|---|
| Documents | own files, often with large individual items | Sort by size, then selectively delete |
| Applications | installed apps and accessories | Remove rarely used programs |
| Photos | Media library with originals | Optimize your media library, originals in iCloud |
| Fuses | iPhone and iPad backups | Delete old backups |
| Wastebasket | deleted but still existing files | Empty automatically after 30 days |
| System data | Collective category without its own assignment | Do not touch by hand |
The "Recommendations" section at the top offers four toggles: back up everything to iCloud, automatically empty the trash after 30 days, remove watched movies and TV shows, and generally optimize storage. However, the iCloud options only move data – they require corresponding storage space in your iCloud plan, which can be reflected in the... iCloud costs is suppressed.
Device backups of iPhone and iPad
The largest single storage space on many MacBooks. Those who regularly back up their iPhone to their Mac quickly accumulate several backups, each between 30 and 100 gigabytes in size – and older backups don't disappear on their own.
The most reliable way is via Finder: Select the device in the sidebar and manage the backups in the device overview. There they are listed with date and size, and can be deleted individually. In the storage overview, they appear in a separate category depending on the configuration.
Before deleting anything, check the date. Keep only the most recent backup; all older ones can be deleted. If you're already backing up via iCloud, you often don't need the local copy at all – the differences are explained in the iPhone backup guide.
Photos: the silent permanent occupancy
The photo library grows unobtrusively because it never appears in one large file. Two settings help.
In the Photos app settings, you can activate the "Optimize" option under iCloud. This keeps space-saving versions on your Mac, while the originals are stored in iCloud and downloaded as needed. The second option is the Recently Deleted album: Items in this album continue to occupy space for up to 30 days and can be deleted immediately.

What exactly iCloud handles and what it doesn't is explained in the iCloud overview.
Find downloads and large files
The Downloads folder is the classic repository for installation files that nobody needs after installation. A quick look at the list view, sorted by size, will clean it up in just a few minutes.
System-wide search is possible via the Finder:
- Open a Finder window and press Command + F
- Select „This Mac” at the top.
- In the first selection menu, select "Other", search for "File size" and activate the checkbox.
- Set the condition to "is greater than" and enter a value, for example 500 MB.
The search results list shows all large files across the system. Be careful with anything that doesn't look like a separate document: Virtual machines, project files from video editing software, and databases are often part of running programs. After deleting a file, you must empty the Recycle Bin; otherwise, the amount of free space will remain unchanged.
Apps and their data remnants
To uninstall apps, drag them to the trash. What remains are settings and temporary files, which can range in size from a few megabytes to tens of gigabytes, depending on the program – especially for video editing, music, and development tools.
They can be found via Finder under "Go To", "Go to Folder" in these three paths:
~/Library/Application Support~/Library/Caches~/Library/Containers
Herein lies the most important rule of the entire article: Only delete folders that clearly belong to an app that is no longer installed. Anything whose name is meaningless should remain. Deleting a system folder wastes more time than those few gigabytes are worth.
Local Time Machine save points
If the backup drive is not connected, Time Machine saves backup points locally on the internal SSD. These usually appear under "System Data" in the overview and regularly cause confusion because the amount of space used is inexplicable.
You don't need to delete them: macOS removes them automatically as soon as the space is needed for something else. If you want peace of mind, connect the backup drive regularly – then the data will be moved to where it belongs. Instructions on how to set this up can be found in the Time Machine backup guide for Mac.
Why “System data” is not emptied manually
According to Apple, this category collects everything that doesn't fit into any other category: caches, logs, utilities, fonts, restore points, and third-party files. It's not a junkyard, but rather a leftover collection – and that's precisely why there's no cleanup button.
What helps is an indirect approach: shrink backups and media libraries, connect the backup drive, and empty the trash. If the system needs temporary breathing room, for example for an update, the Mac can be started in safe mode – this deletes certain system caches, which are then automatically recreated.
Cleaning programs that automatically scan "system data" are not recommended. They regularly delete files that an app still needs, and the time spent repairing them outweighs the benefit.
Show folder sizes in Finder
The size of individual folders can be displayed directly: Open the folder in Finder, switch to list view, press Command + J to access the view options, and activate "Calculate all sizes".
This setting only applies to this one window and must be set again elsewhere. Calculating large folders also takes a moment. For a quick overview, the storage overview remains the better option – the Finder is only useful if you have a specific suspicion.
This is what makes the effort truly worthwhile
The most honest order is: device backups, photos, downloads. These three account for over eighty percent of the problem on most MacBooks, and all three can be done in fifteen minutes. Caches and leftover data, on the other hand, are meticulous work with limited results and the highest risk of damaging something.
With a 256-gigabyte SSD, however, this is a losing battle. A single system update requires tens of gigabytes of free space, and consistently running the system below ten percent free capacity noticeably slows it down. Anyone regularly hitting this limit is better off with an external drive for media libraries and archives than with monthly clean-up sessions.
Which category takes up the most space for you – old device backups or your photo library? Let us know in the comments which one you've benefited from the most.
Frequently Asked Questions: Freeing up MacBook storage space
Everything that doesn't fit into any other category: caches, logs, fonts, utilities, local backup points, and third-party files. It's a residual set, not a junkyard – that's why there's no cleanup button. It can only be reduced in size indirectly.
The problem usually lies with items that don't look like files: old backups from iPhones or iPads, the photo library with full-resolution originals, and leftover data from uninstalled programs. The Downloads folder is the third classic culprit.
As a rule of thumb, around ten percent of the total capacity. Below that, the system becomes noticeably slower, and larger system updates require double-digit gigabyte amounts of free space anyway.
For what this article describes, no such program is needed. Programs that automatically scan system data regularly remove files that an app still requires. The effort required to repair these files outweighs the space gained.
They remain visible in Finder and are loaded as needed. Only a placeholder is stored locally. Sufficient storage space in your iCloud plan is required – only 5 GB is free; anything beyond that is subject to charges.
No. The data of active programs is also stored there. Only folders that clearly belong to an app that is no longer installed should be deleted. Anything with an unclear name should remain.
Deleted files initially end up in the trash and continue to take up space. Only emptying the trash frees it up. The same applies in the Photos app to the album with recently deleted items, which retains content for up to 30 days.